The best first success in Tamaat is not trying every feature. It is completing a compact GIS journey end to end: opening the workspace, creating or opening a project, adding layers, inspecting the map, and understanding where to go next for deeper work.
Goal
Create or open a map project, bring in operational layers, and reach a point where the project is ready for analysis, editing, ETL, API publishing, or sharing.
Step 1: Start in Workspace
Open Workspace and confirm:
- which project you want to work in
- how many datasets and files are already available
- whether this work belongs in an existing project or a new one
Step 2: Open Map Builder and create or open a project
Move into Map Builder and either:
- open the project you want to work in, or
- create a new project for the task
At this point, the goal is to establish the project as the working container for the rest of the GIS task.
Step 3: Add operational layers to the project
Add the layers you need for the job. A practical first project usually includes:
- a point or address layer
- a line or road layer
- one or more supporting polygon layers such as service areas, FSAs, or buildings
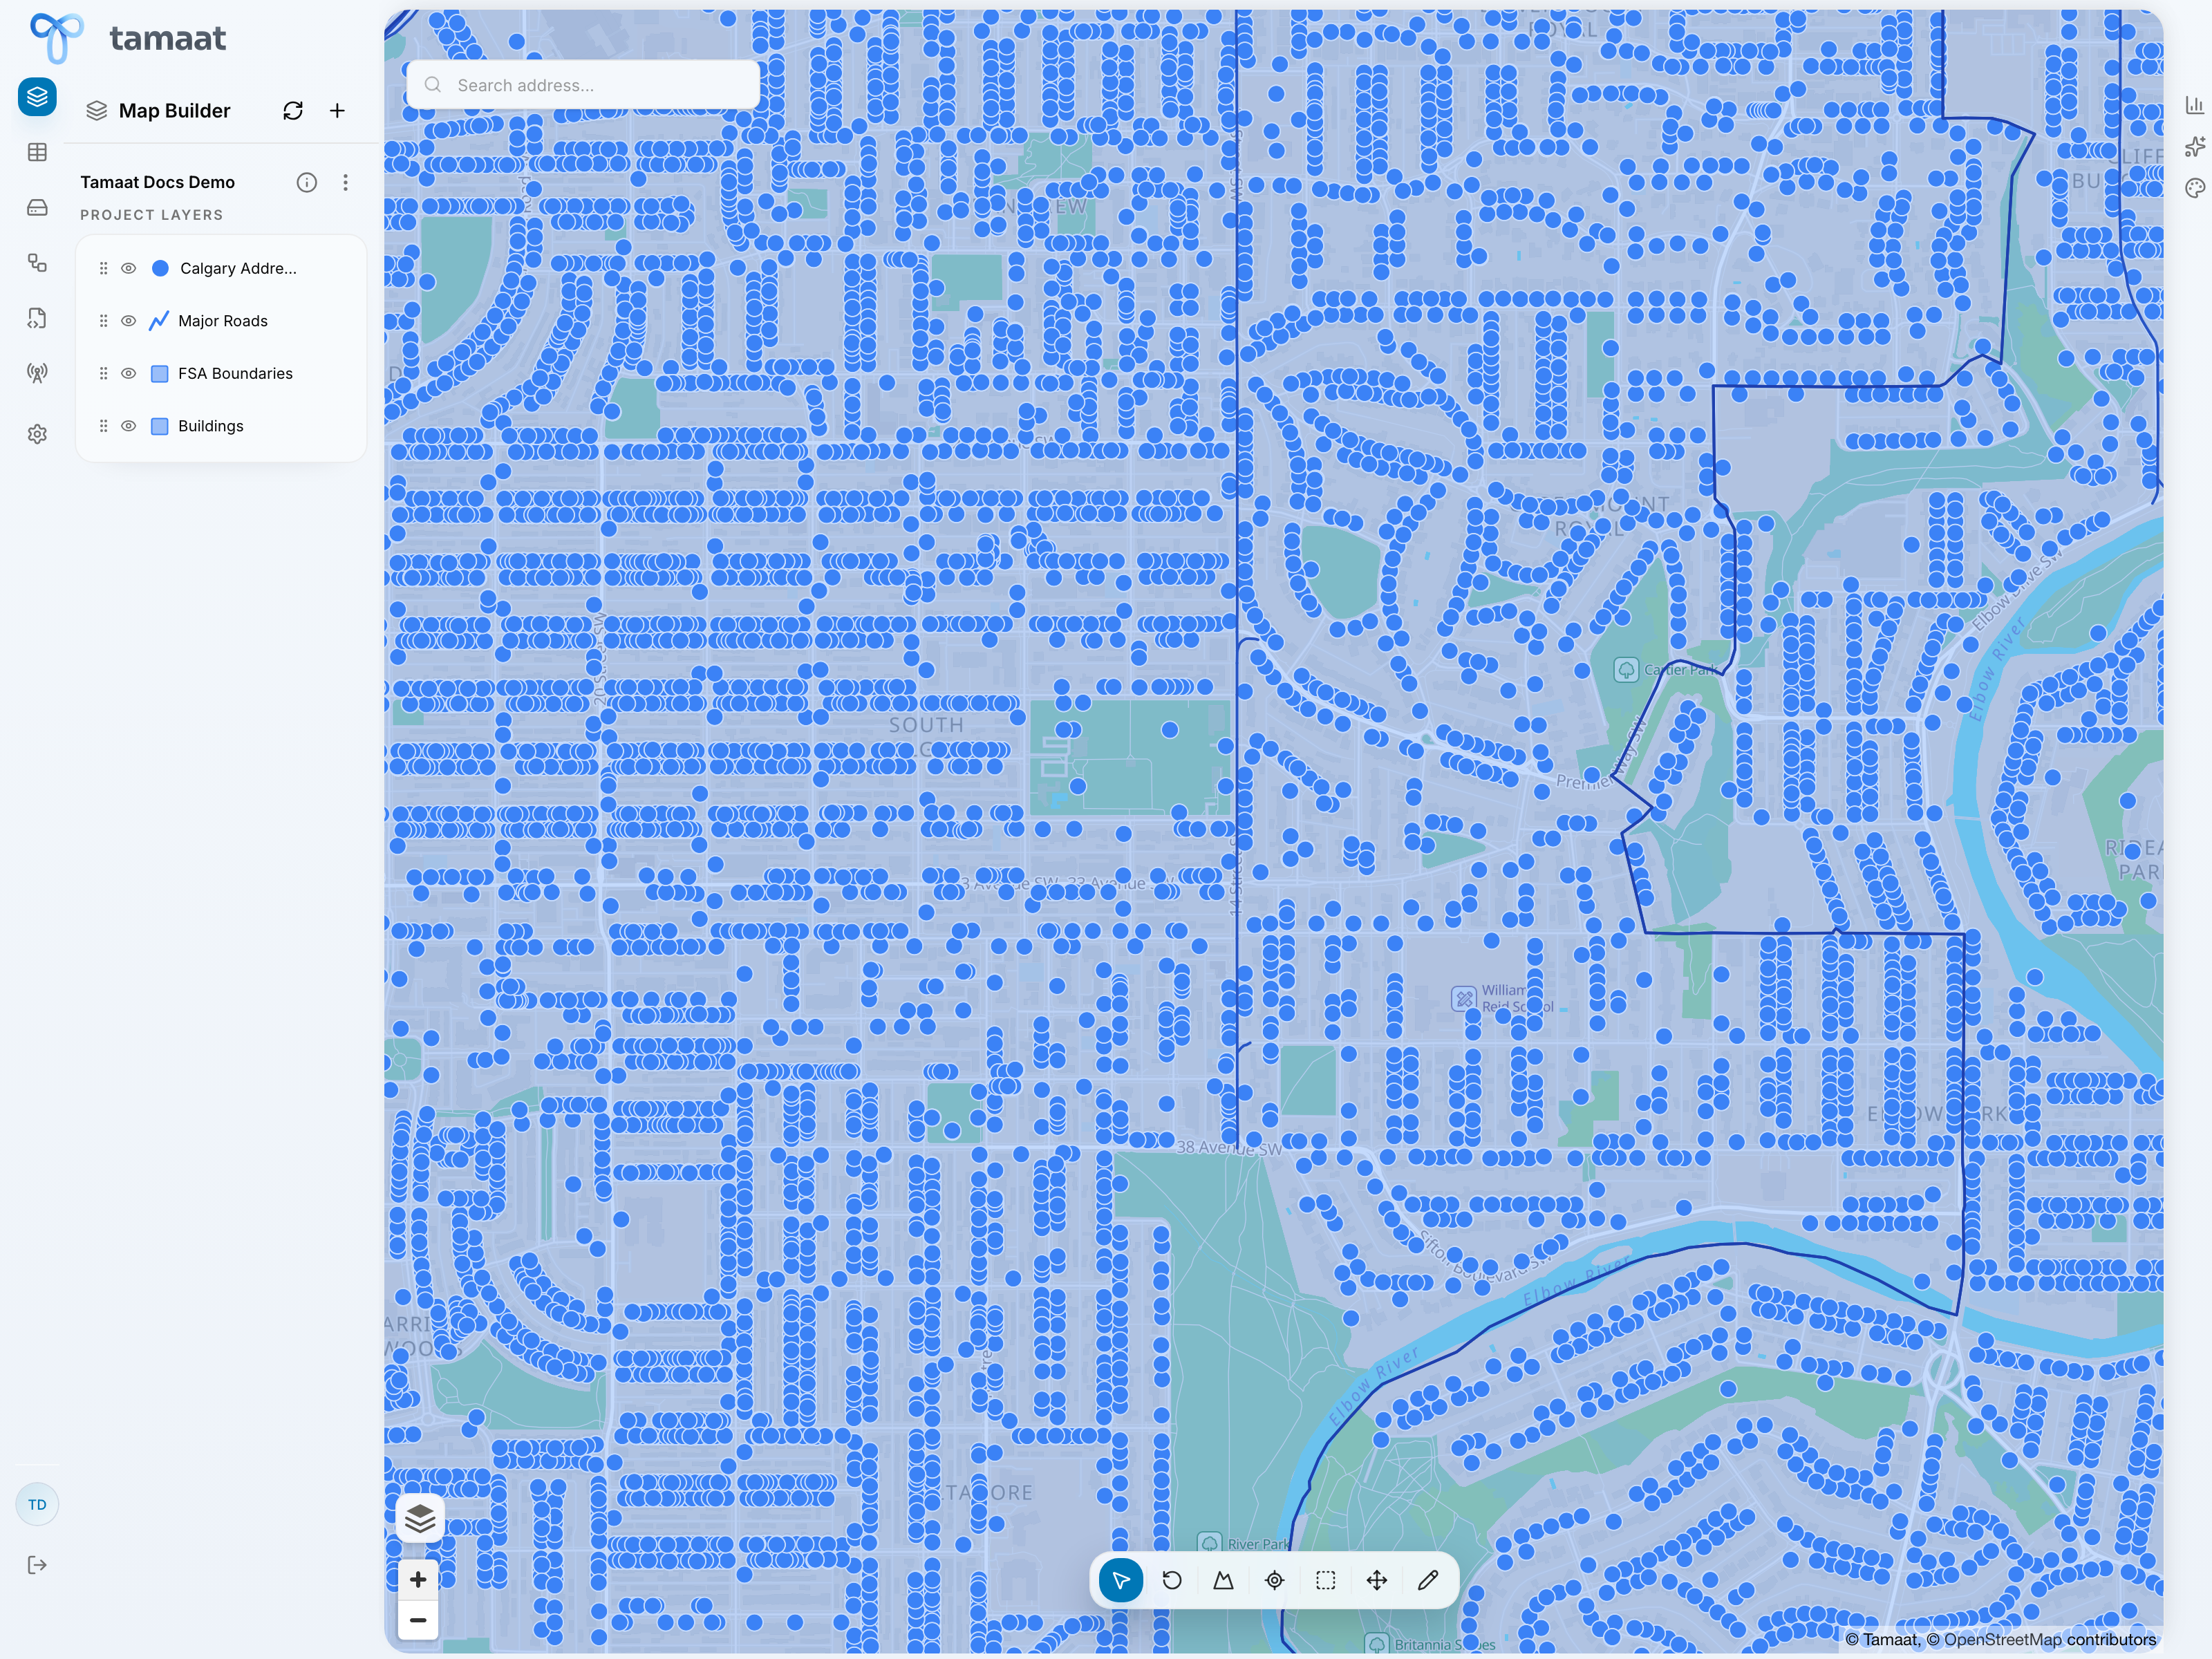 Map Builder overview
Step 4: Organize, inspect, and configure the layers
Inside Map Builder:
- zoom to a layer to validate where it sits
- open layer actions to access table, styling, visibility, specs, versioning, and sharing controls
- group related layers together so the project is easier to operate
- open labels, symbols, and visibility settings to make the map easier to read
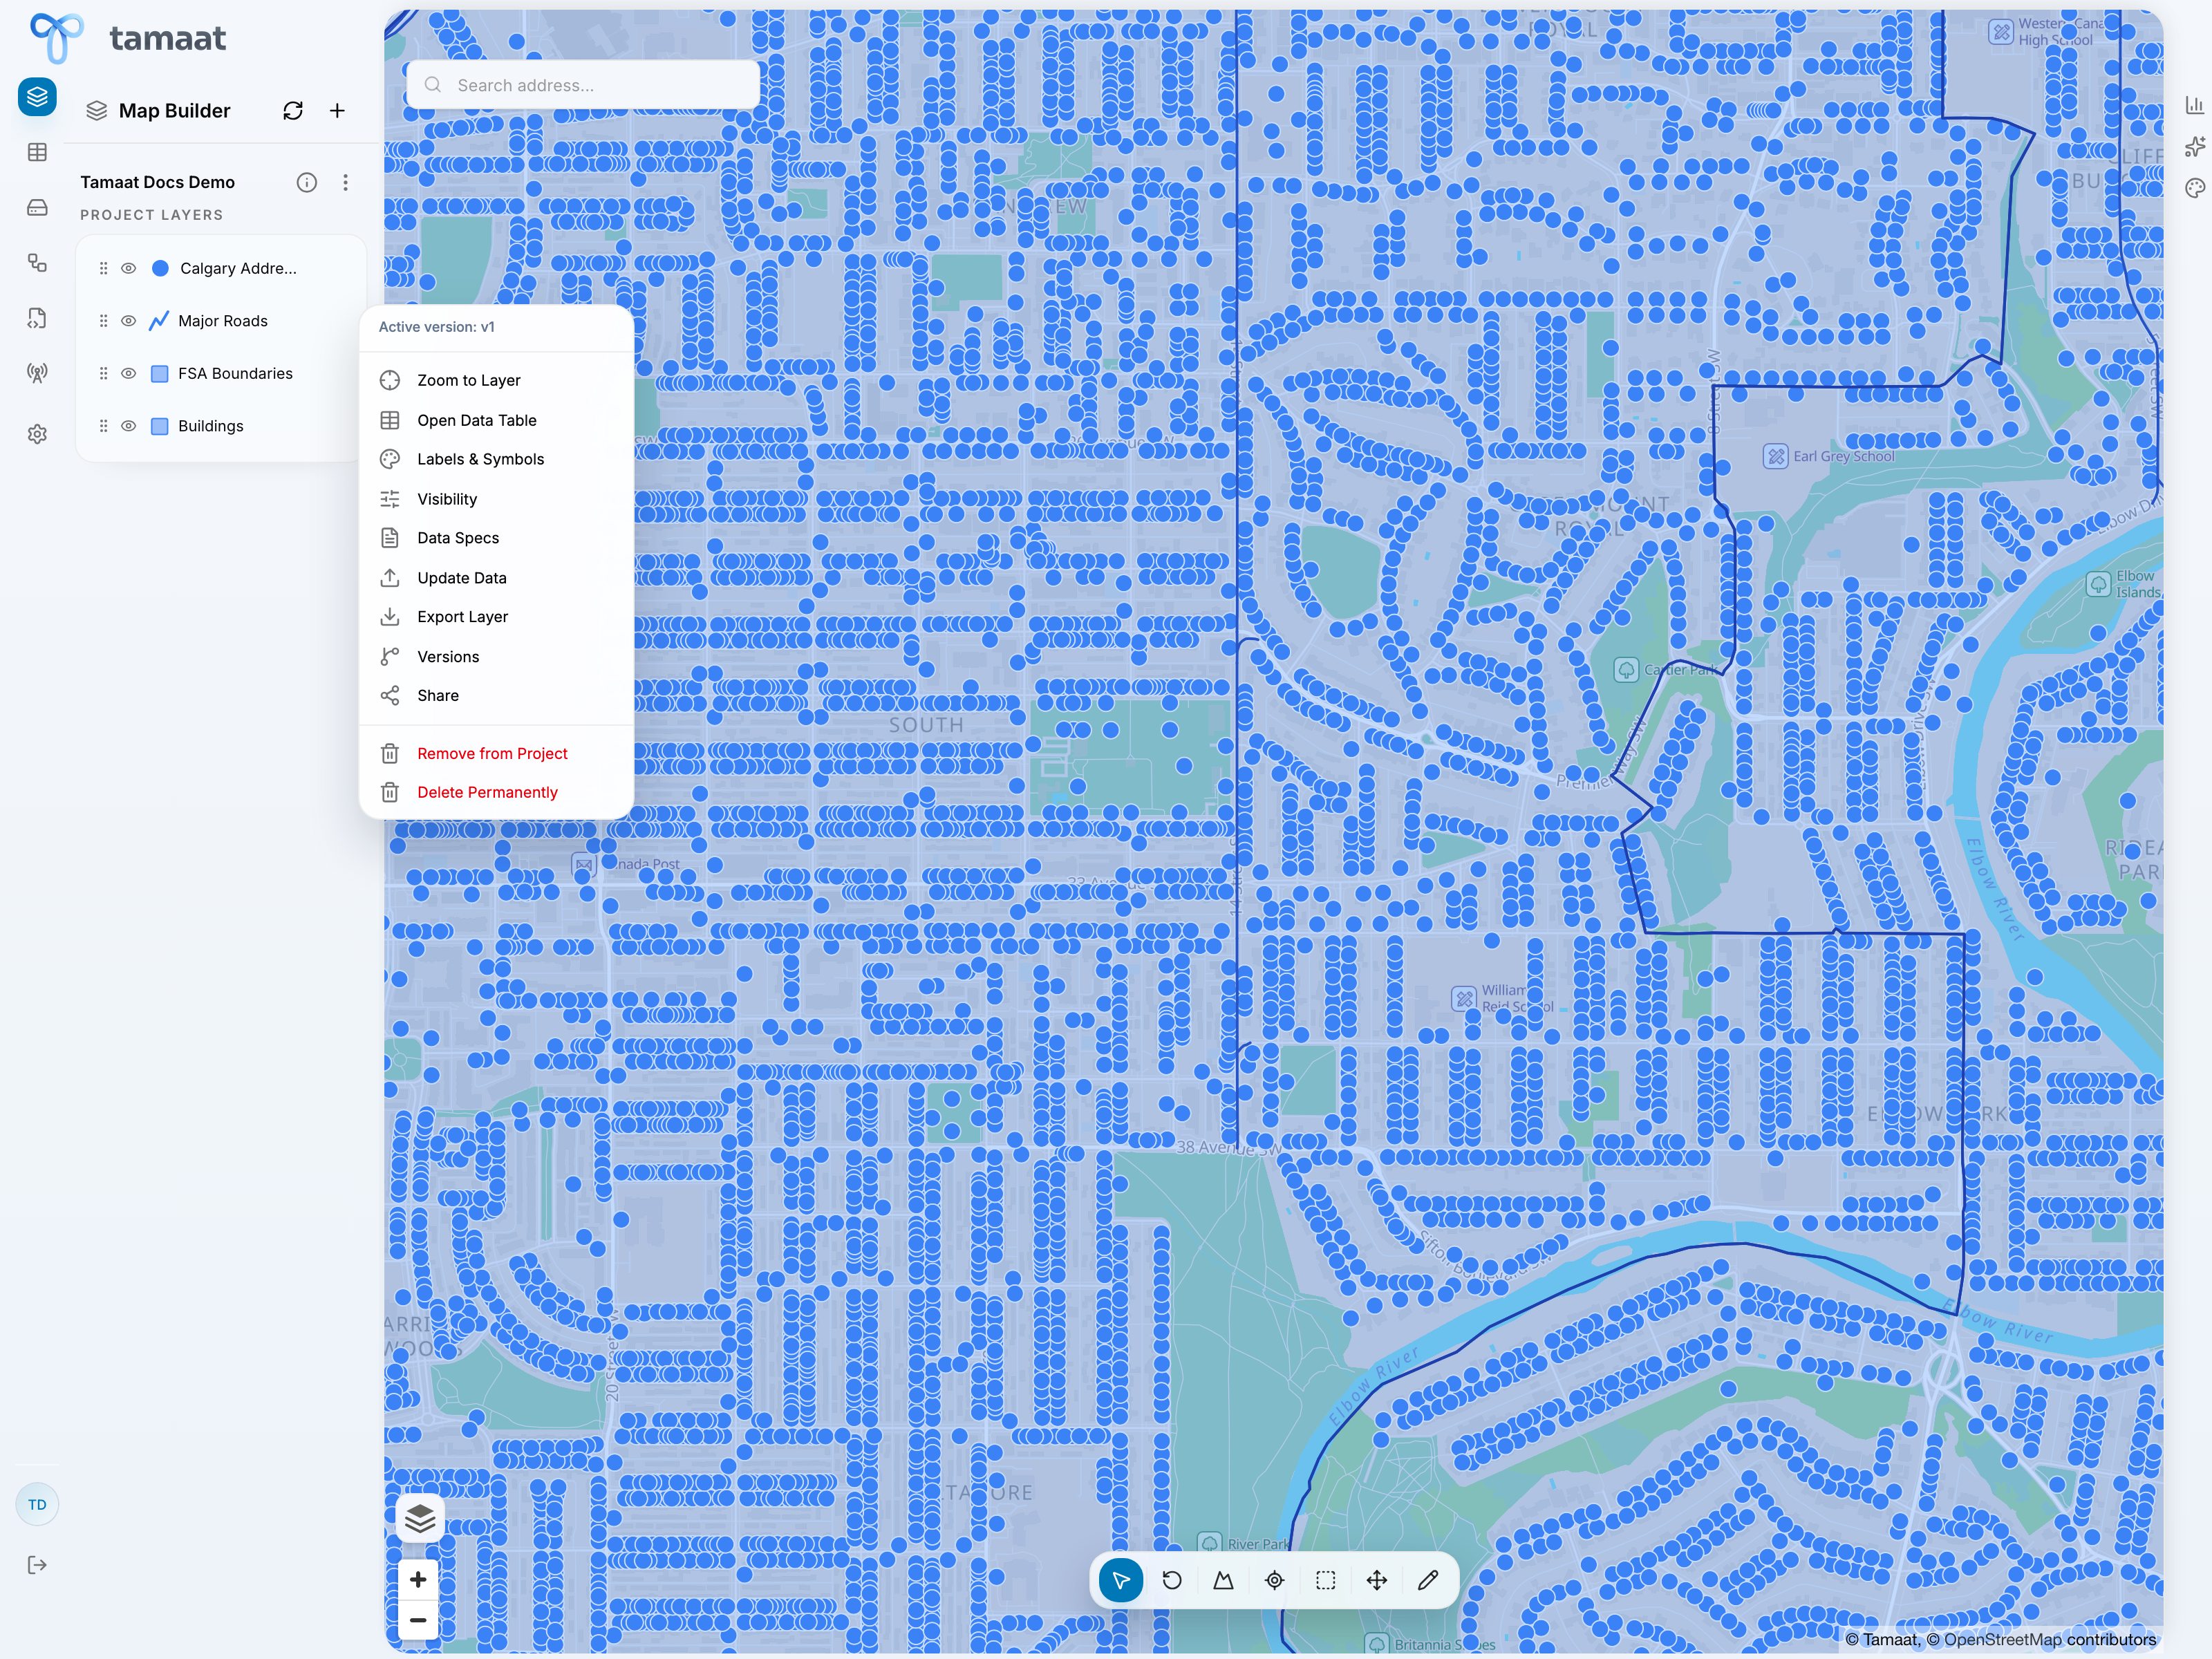 Layer actions
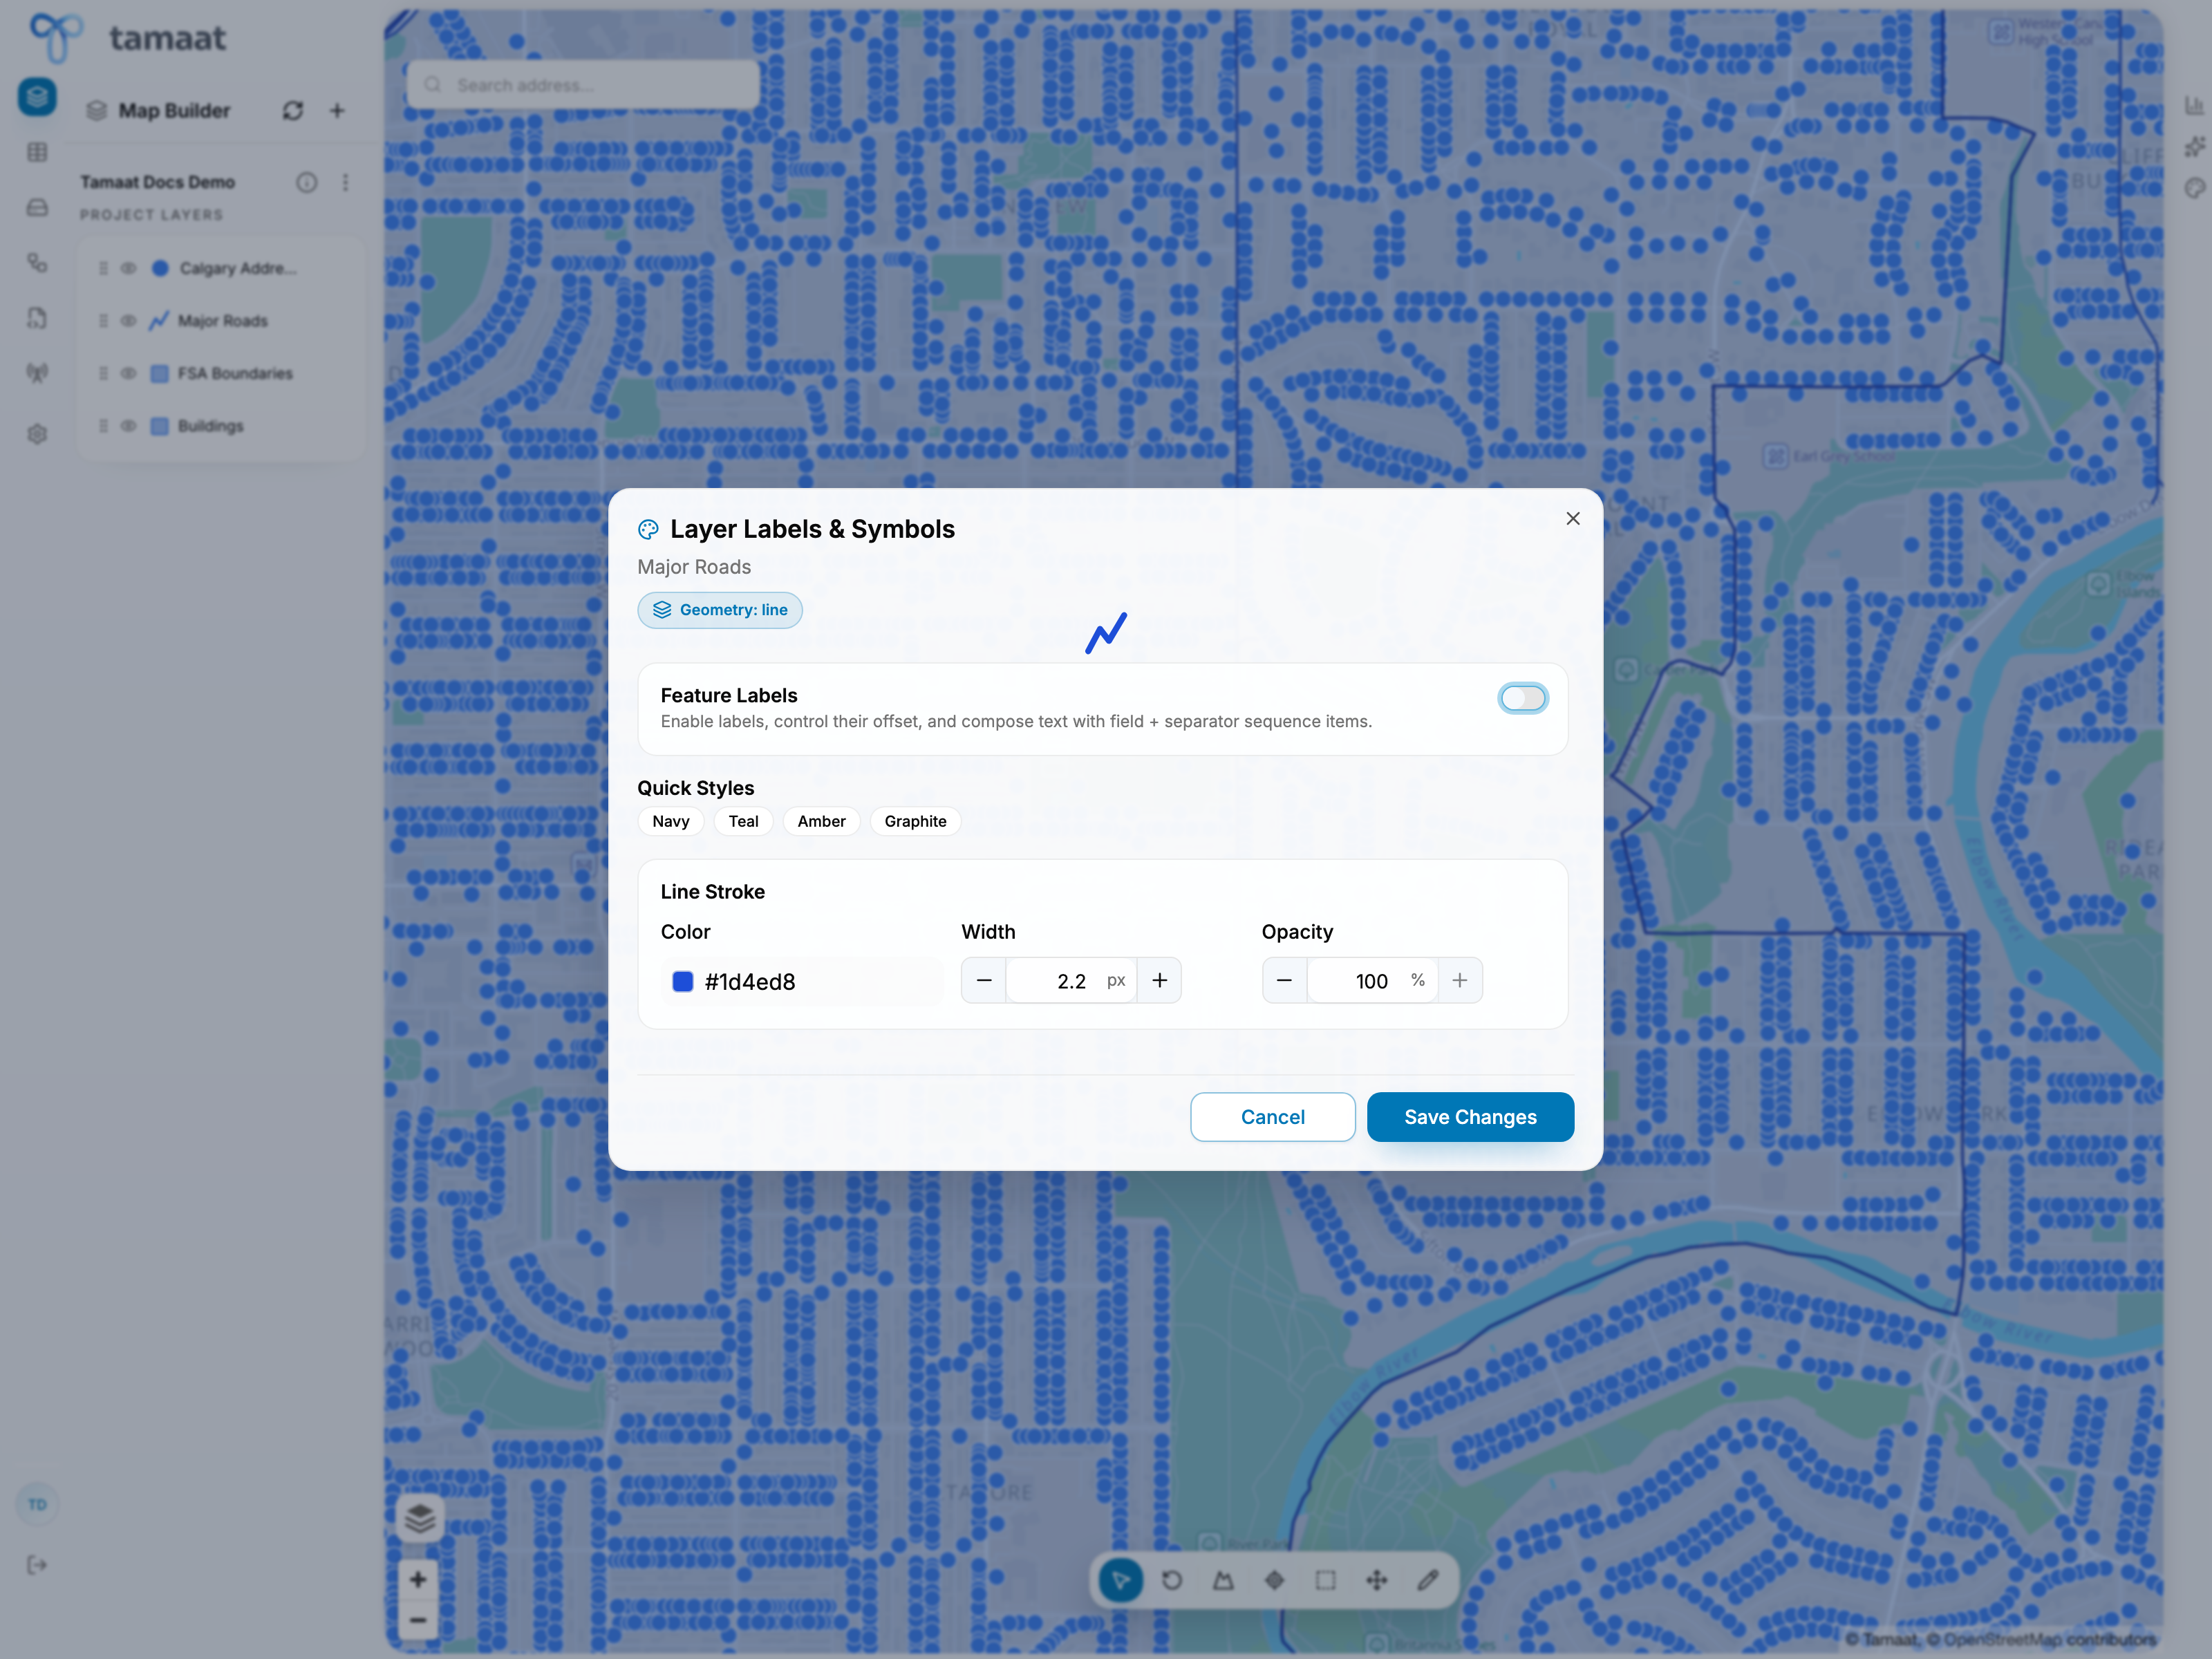 Labels and symbols
 Visibility settings
Step 5: Validate the data behind the map
Use Map Builder and Data Store together:
- inspect the map visually in Map Builder
- open a layer table when you need row-level confirmation
- move into Data Store when you need deeper dataset inspection
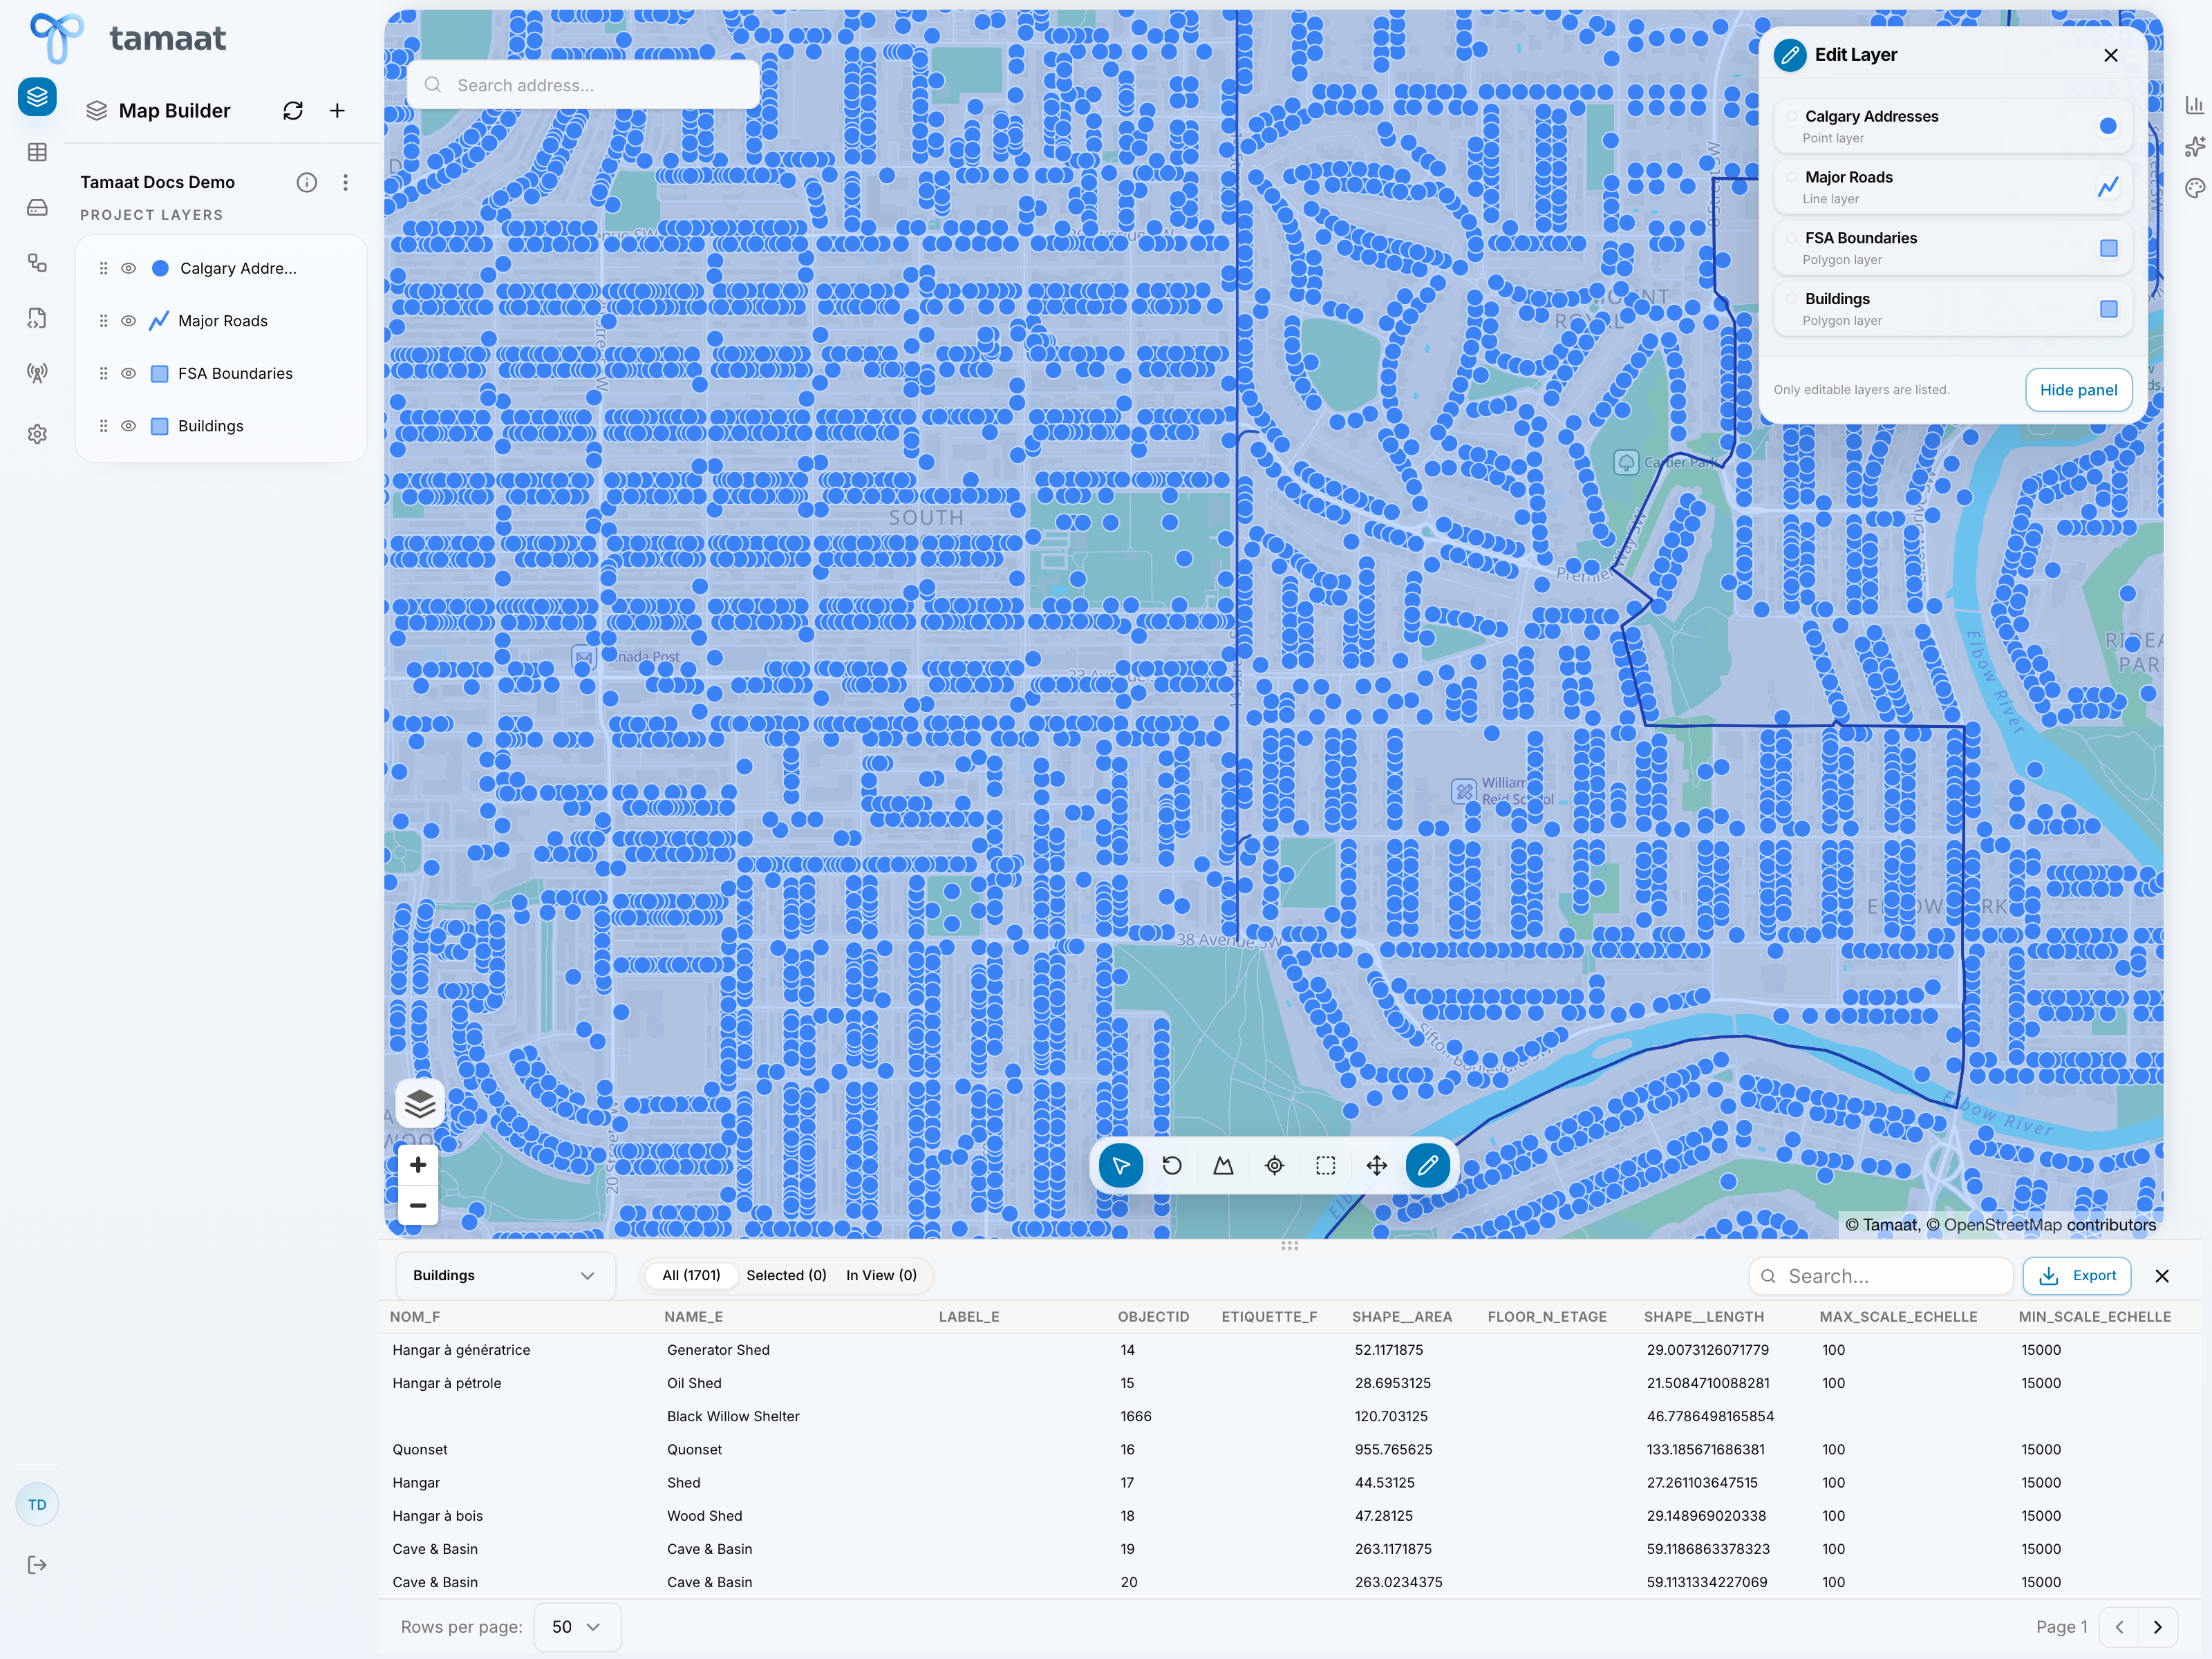 Layer data table
Step 6: Decide the next operating surface
Once the project is in a good state, choose the next pane based on the actual job:
- ETL Builder if the data needs repeatable transformation
- API Builder if the data needs to be exposed operationally
- Network Studio if you are doing coverage work
- Settings if the next step depends on search, geocoding, basemaps, AI, or session behavior
- AI Assistant if you want to query the active project in plain English