Three taps take you from the map to a saved record: +, "Add here", "Save".
1. Tap +
Tap + at the top of the controls on the right. The first time, choose the layer the record belongs to; the app remembers it, so the next record goes straight to the map. The first time in a session, the phone also asks for Face ID or its passcode, which keeps your saved work private.
2. Place it
A target sits in the middle of the map. Move the map until the target is on the spot, or tap "My location" to bring it to where you stand. Then tap "Add here".
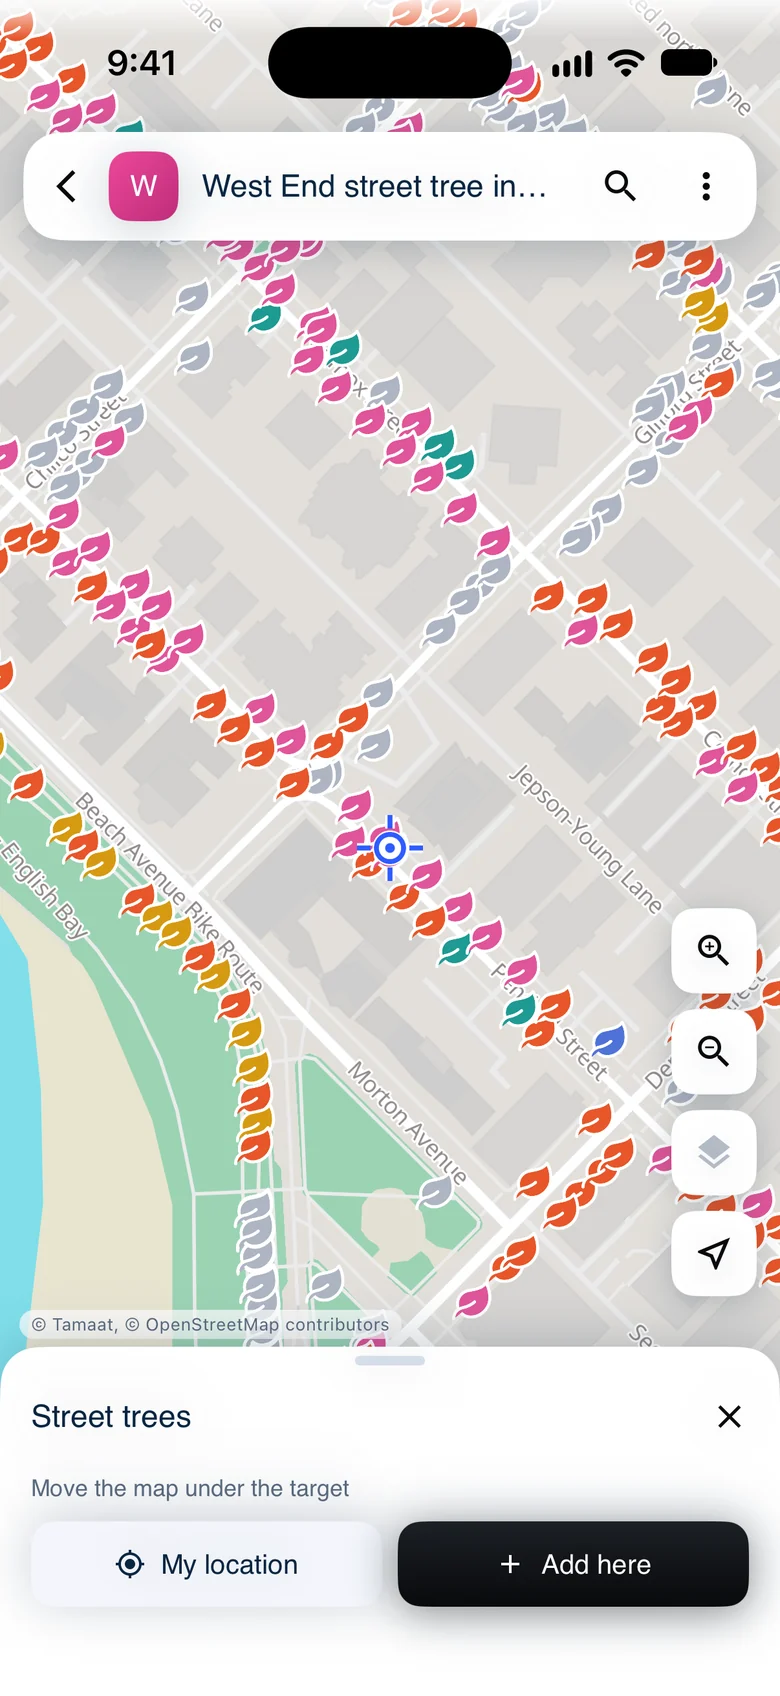 The place step: a target on the map, with My location and Add here
For a line or an area, tap "Add point" at each corner, then "Done".
3. Describe it and save
The record's form opens over the map, with the new point still in view. Fill in its fields; required ones come first. Add photos with "Camera" or "Gallery". "Location" shows how the point was placed; tap "Move" to place it again.
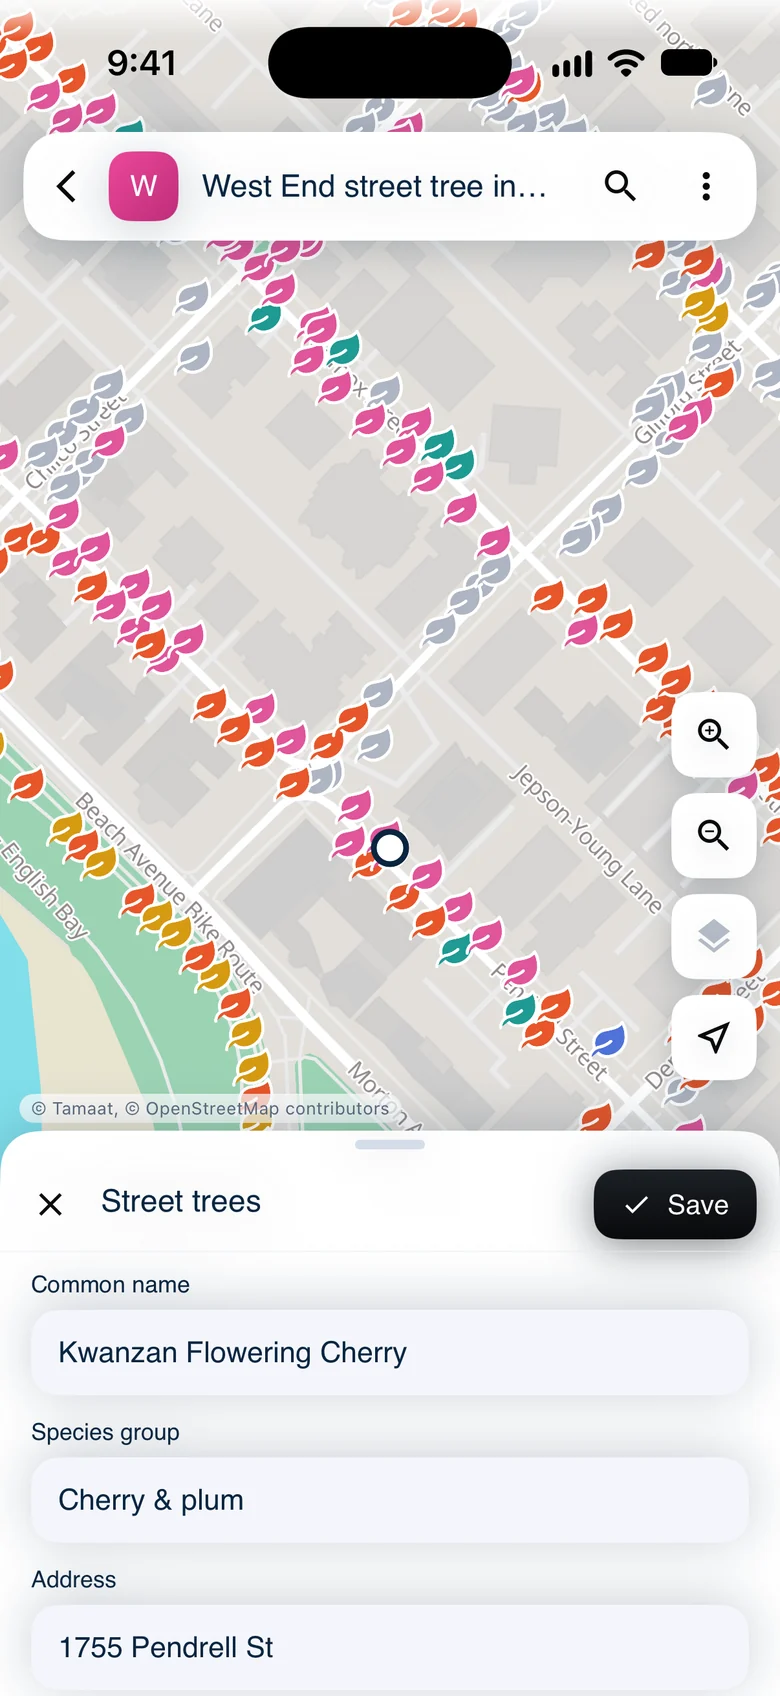 The new record's form with its species, species group, address and diameter filled in
"Save" turns on as soon as every required field has an answer. Tap it, and the record shows on the map at once, as a ring until it has synced and taken its layer's style.
Undo
After a save, "Saved" shows at the bottom of the screen with "Undo". Tap "Undo" within a few seconds and the record is gone again.
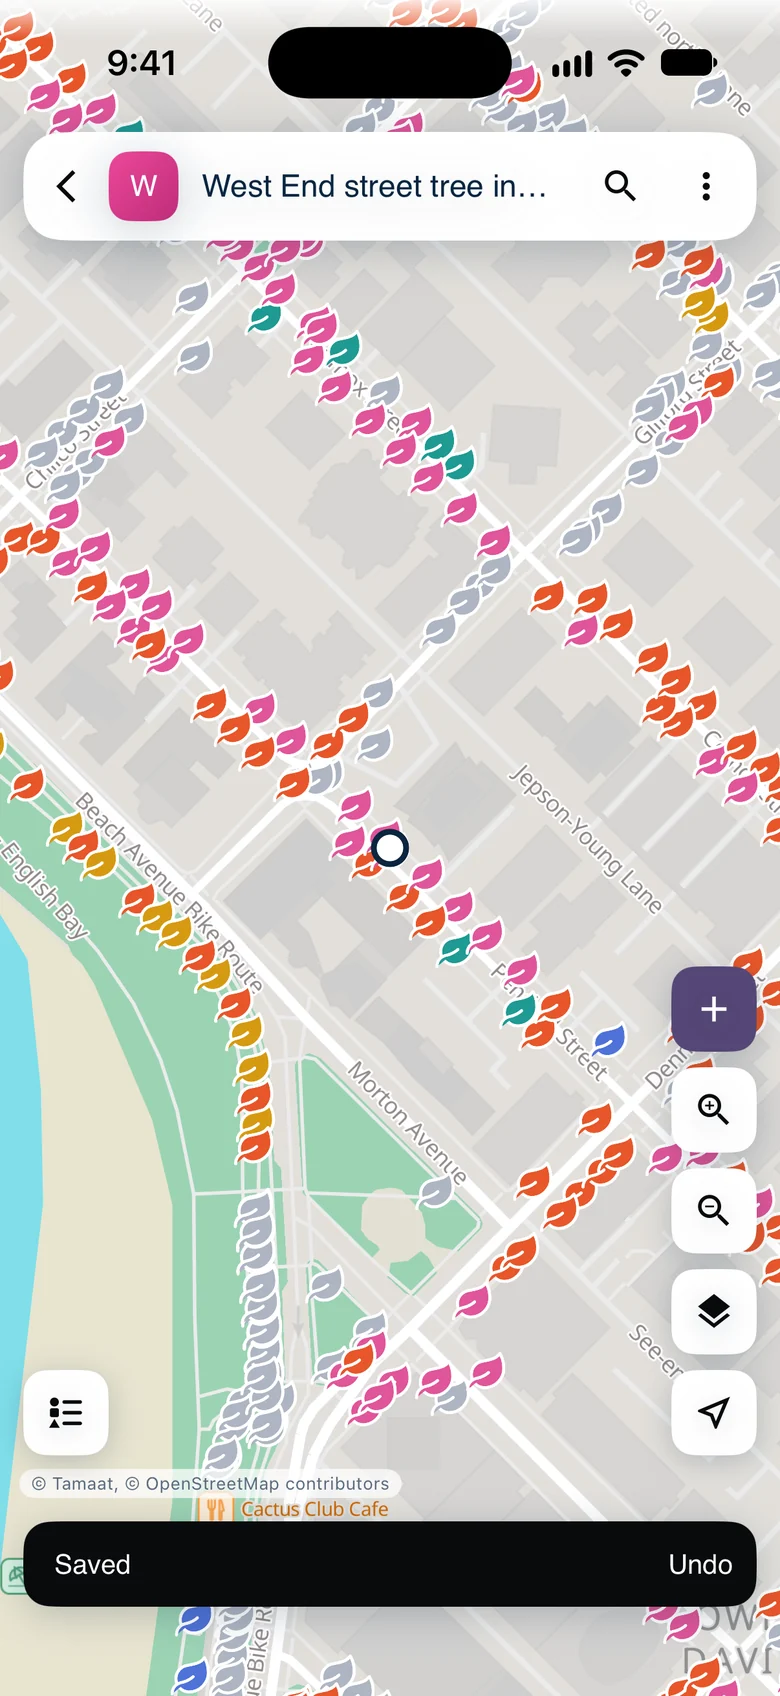 The new tree on the map, with Saved and Undo
To leave a form without saving, tap ✕. If you've typed answers, the app asks whether to "Discard record" or "Keep editing".
No signal?
Saving works the same offline. The record waits on the phone and goes up with the next sync. See Work Offline.
Demo data: City of Vancouver Open Data — street trees.